Venison Loin Fillet served with a Japanese Salad & Ginger Soy Dressing

I’ve not been eating enough greens (apparently) so this is my attempt at eating reasonably healthy.

The key components here are for the Japanese salad and dressing, you can add tuna steak or beef fillet if venison is not available.

This works a treat and the flavours are banging.

Enjoy.

Ingredients
1 Venison Loin Fillet
1 baby gem lettuce(quartered)
200g edamame (soy) beans
4 carrots (grated)
Small beetroot( thinly sliced)

For the dressing
2 tbsp rice wine vinegar
2 tbsp reduced-salt soy sauce
2 tbsp caster sugar
½ small onion(chopped)
2 tsp chopped ginger
1 tbsp tomato purée
2 tbsp vegetable oil

Blend the dressing ingredients together and drizzle over your salad. Sear the loin fillet for 5 mins then slice thinly.

Happy Monday folks.

Easy Venison Biltong

It’s Monday and I have serious hunger pangs. As ludicrous as it sounds, I am having some homemade Venison Biltong for breakfast.

I generally don’t have a proper breakfast when I’m working as I tend to graze, which makes biltong the ideal snack. For starters, it is incredibly lean and because I used venison there is almost no fat and unlike beef, it has actually retained the moisture in the meat and it isn’t as chewy.

Here is the simple no nonsense recipe I used for my first batch:

Homemade Venison Biltong

Ingredients
Topside/Silverside Venison
Biltong spice seasoning (shop bought)

Method

Cut your topside or silverside into strips and coat them with a generous helping of shop bought biltong seasoning rub.

Air dry for 5 days in a ‘Biltong Box’ and it is ready to be eaten.

So simple and delicious to eat.

Enjoy and happy Monday.

Venison & Wild Boar Burgers

It’s Friday and I am excited to be making some Venison & Wild Boar burgers. I’ve never had Wild Boar before but my local gamedealer had some so it would be rude not to try it out. Venison is pretty much fat free and because it is so lean, you really need some fat to bind it together. Pork or beef fat can be used but if you can get your hands on some wild boar then I highly recommend it…it is delicious.

This recipe made 17 burgers using a burger press and they were really thick and juicy. Use this as a rough guide and see how you get on but here we go:

Ingredients

2 kg venison mince

1kg wild boar mince

1 egg

1 onion finely sliced

Cheese (I used cheddar cheese slices)

Sriracha Mayo

Brioche Buns

Smoked Paprika (optional)

Gherkins

Method

Mix your venison and wild boar mince together in a big basin and add your egg. Make sure all the meat is blended together and does not fall apart.

Take a handful of mince, roll it into a ball and shape into a pattie. I used a small plastic burger press which was really handy.

I sprinkled some smoked paprika on top of some of the burgers for some variety. By all means try any seasoning you like.

Place your burgers on a hot grill for 10 minutes. I used my George Foreman grill and it worked a treat.

While your burgers are grilling away, slice your onion and add them to a frying pan with some oil and fry until they go crispy.

Once your burgers have cooked, grab your brioche buns and assemble your burgers. I layered mine up as if it was a piece of art and it went like this:

Bun base>sliced gherkins>burger>cheese>gherkins>onions>sriracha mayo>bun top.

Sit back, stuff your face and feast like a king as these did not disappoint, even my kids loved them.

Pigeon Breast Burgers with Halloumi and Onion Chutney.

Hey, if you’re like me and don’t always want to slave over a hot stove in order to make a lovely meal, then this recipe is for you and it should take no more than 5 minutes to make.

I sat up last night wondering what I could make for dinner. Most nights after work, time is spent trying to get the kids ready for bed and I’m rushed off my feet. I recently bought ten woodpigeon from a gamedealer and the idea of a Woodpigeon Breast Burger sounded really nice, not only that but I had made myself some Caramelised Onion Chutney that begged to be used. Just like that, dinner was ready(in my mind) and I knew what had to be done.

If you’ve never cooked woodpigeon before, it’s very simple: Cook it hot and cook it fast. Pigeon can really dry out if you overcook it but to overcome this, I poached the breasts in some Ruby Ale. Not only does this keep the breasts moist but the beer gives it a bit of flavour.

Enough of the chit chat and let’s get down to the recipe. I hope you enjoy it, let me know if you try it and tell me how you get on:

Woodpigeon Breast Burger served with Halloumi and Caramelised Onion Chutney

Ingredients

4 woodpigeon breasts

1 bottle of Ruby Ale/Stout

Halloumi

Brown Bloomer Bread

Rocket

Olive Oil

Onion Chutney

Method

Grab a saucepan, fill it with 3/4 bottle of Ruby Ale/Stout and bring it to the boil. Add the pigeon breasts and poach for 3 minutes.

Grab a frying pan, add a big splash of olive oil and add some sliced Halloumi, let it fry on a medium heat for 3 minutes.

After 3 minutes, remove the Halloumi and place it to one side. Remove the breasts from the simmering ale and place it in the frying pan then sear for two minutes.

As the breasts are cooking, put 4 slices of bloomer bread in the toaster. Once the toaster pops, slice the pigeon breasts and assemble.

This takes no time at all and its delicious. Enjoy and let me know what you think.

Venison Shepherd’s Pie

If you’re reading this then you have survived Monday. You have been counting down the hours during your working day, ready to come home and chill or do whatever you do outside of the workplace(unless you work from home). You want to get home home, eat some food and put your feet up. As the weather in the UK right now is cold and wet after an unusually warm week, this take on the classic Shepherd’s Pie is the perfect dish to warm you up and make up feel happy.

This dish takes about 70 minutes to cook, of which 30 minutes are for prep and the remaining 40 is the actual cooking time. As a father of two, the chance to good real hearty food can be a struggle at times and I thought I would make things easier for my wife and do all the prep work on the Sunday night. All she needs to do is cook it and everyone is happy.

Todays recipe is my take on Shepherd’s Pie but instead of lamb, I have used some incredible locally sourced venison that I butchered myself, so here we go:

Venison Shepherds Pie

Ingredients
450g minced venison
900g peeled potatoes
1 large white onion finely chopped
1 large carrot diced
1 large parsnip diced
1 celery stick diced
1 clove garlic finely chopped/minced
600ml beef or chicken stock
1 small glass/large glug of red wine (I used a tasty Bordeaux)
120g white mushrooms chopped
2 tbsp chopped parsley
Decent knob of butter
Splash of milk
Pepper/Salt for seasoning (if required)

What next:

. Grab a large saucepan, fill it with water and add your potatoes. Bring to the boil and cook for 15-20 mins or until soft, but not too soft. Chop all of your veg and add them to a hot frying pan with a knob of butter and cook away on a medium heat until the onions start to soften.Add 450g of minced venison to the frying pan and cook until the mince has browned.Add your garlic and a large glug of red wine and reduce for 5 minutes.After roughly 5 minutes, add the beef or chicken stock as well as the chopped parsley and let it simmer away nicely for 15 minutes.Check your tatties after 15 mins and if they feel soft, take them off the heat and drain them.Once drained, return them to the pan, add a big knob of butter and a generous splash of milk and mash away to get them nice and creamy. Add pepper/salt to taste and put them aside.
After 15 mins of cooking, check the mince and if the sauce is a bit watery, by all means add some cornflower to thicken.Once the sauce has thickened, remove from heat.
Add your saucy mince into casserole dish and smother your mashed potatoes on top. Don’t forget to fluff the potato topping with a fork to make it look nice.Pop it in the oven at 190C and bake for 30 minutes.
Remove from oven, plate up and serve.

Homemade Venison Meatballs

It’s Sunday which means the day of rest……I think. It’s been a mentally draining week due to health issues concerning my daughter and whenever I get stressed I like to eat and oh boy did I EAT.

I should probably start off by saying the venison used in this recipe is a close as field to fork cooking as I could ever imagine. A local gamedealer got in touch with myself as he had recently shot a Roe Deer (17.kg) and I could have it if I wanted. Only a fool would say no so I spent my Saturday skinning and butchering the deer in my kitchen, the end result was 10kg of pure local venison:

The massive pile of meat to the bottom right, was turned into 2kg of mince, which was used to make venison Meatballs. Now I love cooking and at age 35, a homemade meatball is something I have never made so in my usual approach to most things in life, I jumped in with two feet and made one of the best meals I’ve eaten for a long time.

The highlight of this little venture is that my 4 year old daughter got really involved and helped mince the meat, add the ingredients and craft a massive pile of meatballs:

The recipe I used was found online and serves 6 people, needless to say we did not eat all of these and some are in the fridge for another day. What I will say is that if you are super organised, make the Ragu the night before to save yourself some time as it took a while to reduce. I got there in the end but the wife and kids were demanding dinner for a long time.

Dinner was served and it was a big success. Kids didn’t like the Ragu but I did add more wine that I should’ve (whoops) so I don’t blame them. I’m just happy they tried it and enjoyed it, not only that but they know where the meat game from, what went into the meatballs and had a right tasty dinner.

Thanks for reading.

Keith

Ingredients

For the meatballs

For the ragu

To serve

  • Linguine, cooked according to packet instructions
  • parmesan, freshly grated

Method

  1. For the meatballs, beat the eggs and milk together in a bowl. Add the minced venison, breadcrumbs, parmesan and garlic and mix well.

  2. Mould the meatball mixture into balls, each the size of a golf ball.

  3. Place the meatballs onto a plate or tray and chill in the fridge for 20 minutes.

  4. Heat the oil in a frying pan over a medium heat.

  5. Remove the meatballs from the fridge and place into a hot frying pan. Fry for 8-10 minutes, or until golden-brown all over.

  6. For the ragu, heat the oil in a separate frying pan. Fry the onion, carrot, celery and garlic for 5-6 minutes, or until softened.

  7. Add the tomato purée and cook for a further 7-8 minutes, until the sauce is thick and deep red in colour.

  8. Add the wine, chicken stock and rosemary and bring to boil. Reduce the heat and simmer for 45 minutes to an hour.

  9. Add the meatballs to the sauce and simmer for 5-6 minutes, until the meatballs are completely cooked through.

  10. To serve, place a generous portion of cooked spaghetti into each serving bowl. Spoon over equal amounts of the meatballs and sauce, and finish with grated parmesan.

Sustainable Food

Before you read any further I feel that I should make you aware that this post is about my first deer stalking experience and there are photos that some people may not like. Nothing too graphic, just a dead deer, which I appreciate could be upsetting to some.

So here we go……

It’s 3.30am on Saturday 23rd February and my Amazon Echo alarm is playing I, Alan Partidge. Not going to lie but I was unaware this was my default alarm sound and it gave me a fright but nonetheless, I was awake and about to embark on a 2.5hour drive from Edinburgh to Dumfries & Galloway for my first Deer Stalk.

As I said in a previous post, I had no idea what to expect but it was mainly a sense of nervous excitement. I arrived at 6.45am for a 7am start where I was met by my guide, Kris. A brief handshake and “good morning” took place and off we went on our quest to stalk deer.

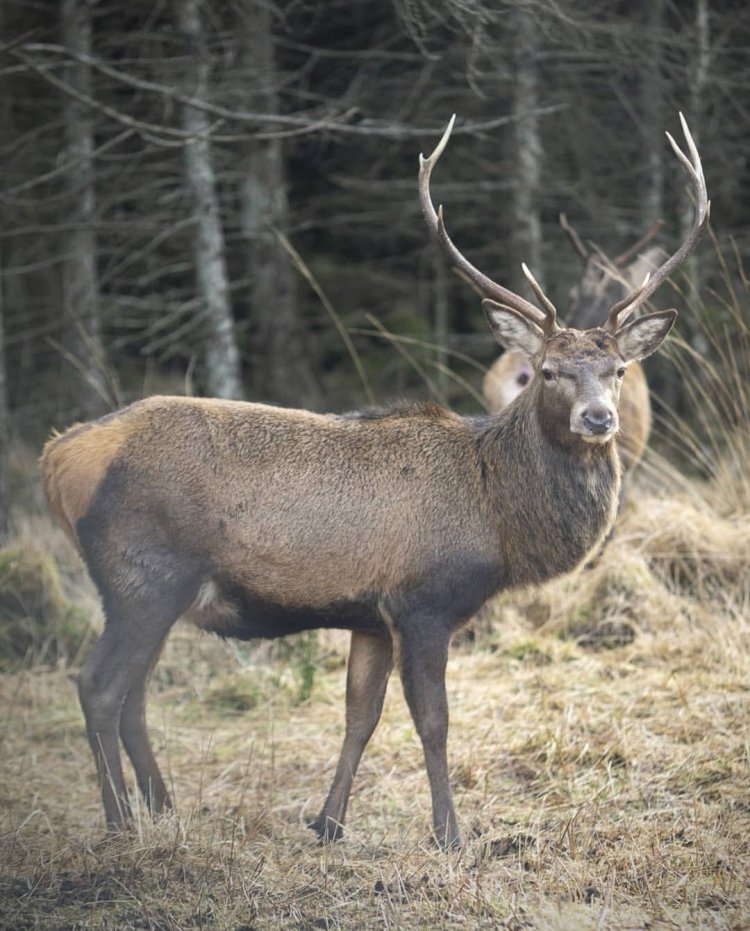
Now before you berate me about hunting being cruel…blah blah blah, what you have to understand is that deer, as lovely as there are to look at, are considered pests. They destroy plantations and need to be culled in order to protect the new forests. It’s very simple really.

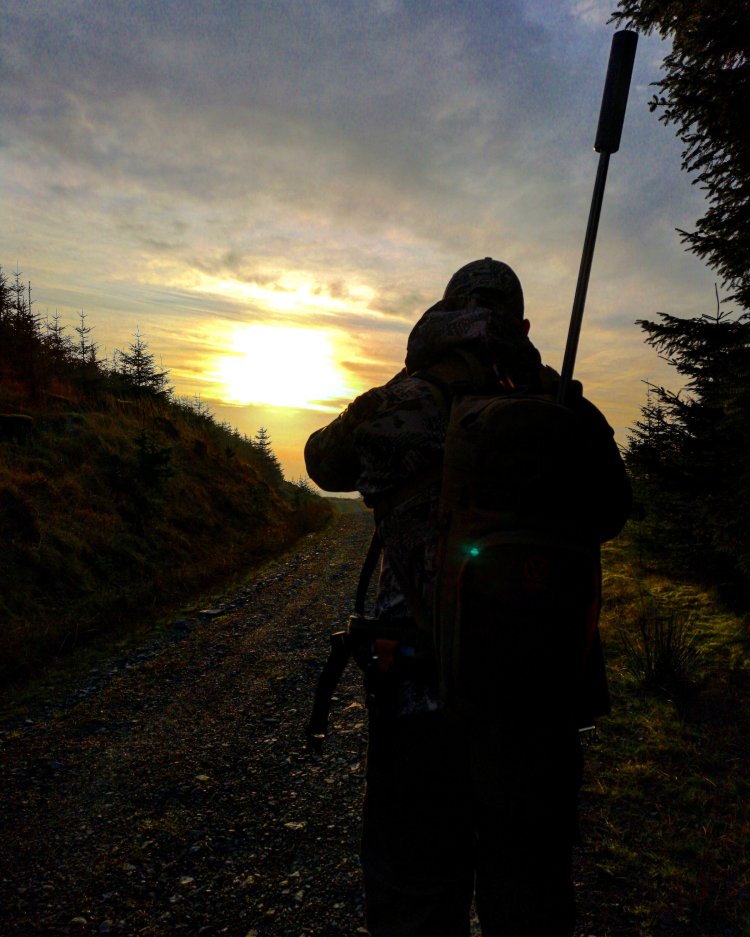
My guide takes me through some incredible terrain with stunning views but very little deer. In the space of a 3-4 hour stalk, we see the back end of two or three deer and that’s it. Was I disappointed? Not really because deer are wild animals and I am in their stomping ground. The weather also plays a part and sometimes deer just don’t want to show face.

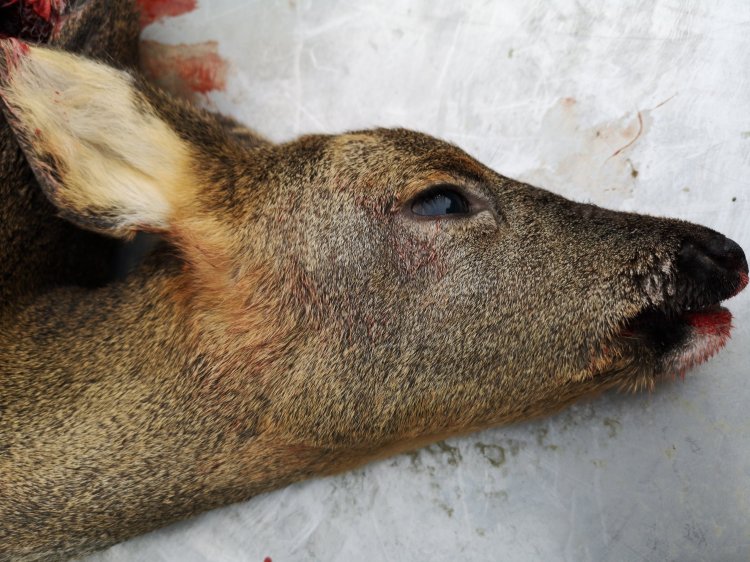
As we began our journey back to base, I sat in the passenger seat of the truck when out of the corner of my eye I spot four deer. Their ability to hide is incredible because neither myself or my guide had spotted them seconds before. I excitedly remark to Kris that four deer were bouncing up the hillside to which he urgently replies “GET OUT”. Like an excited child, I bolt out of the truck, keeping a close eye on the deer and thankfully for me, they are still in sight. Kris passes me his rifle and asks if I can see them. As I focus through his Leica Optic, I can see the deer as clear as day and appear closer than they are. “TAKE THE SHOT” he says….and as I use the bipod to balance the rifle on the bonnet of his truck and I pull the trigger and bang…..

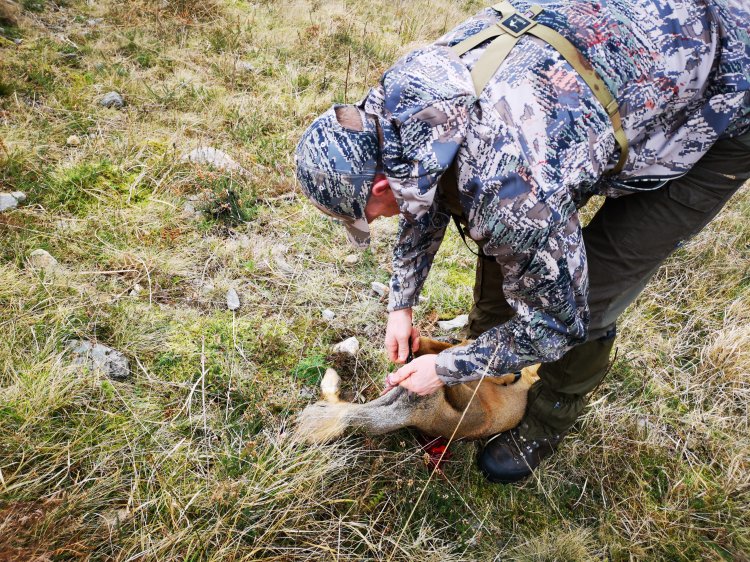
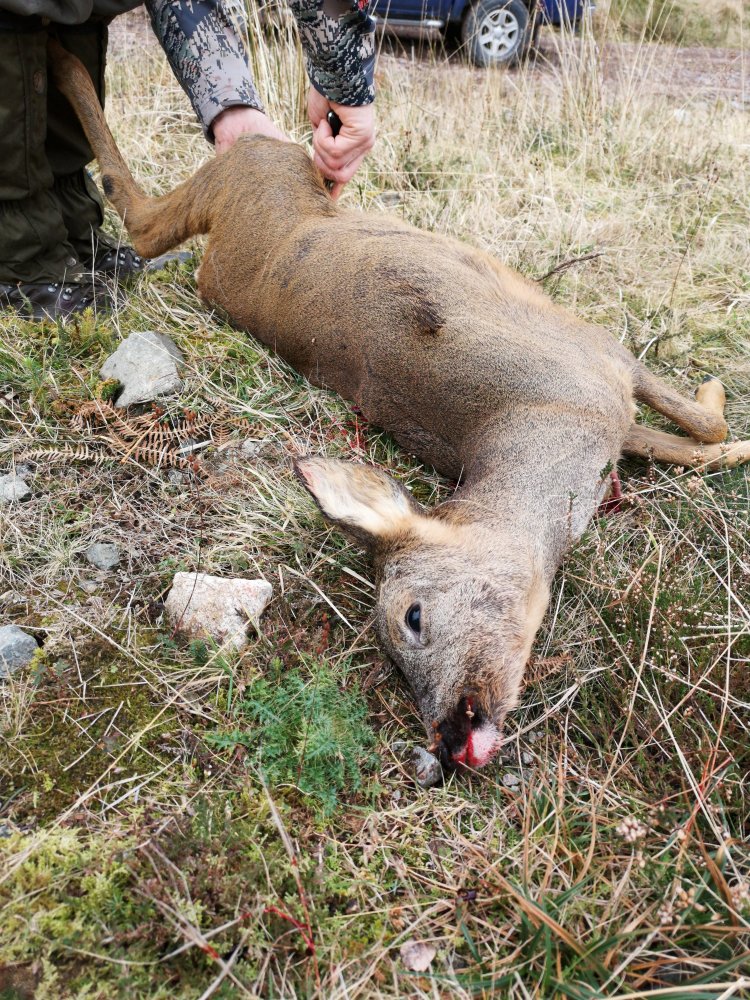
“Well Done” he says as as he shakes my hand and that was it, I had shot my first deer and what a thrill it was. He used his range finder to mark the spot 170yards on a hillside. I attempt to climb the hill as fast as I could but reality hit and the years I’ve spent sitting on my arse behind a computer came into full effect. As I puffed and wheezed up the hill, Kris had already inspected the animal for me and told me it was a good clean ethical kill.

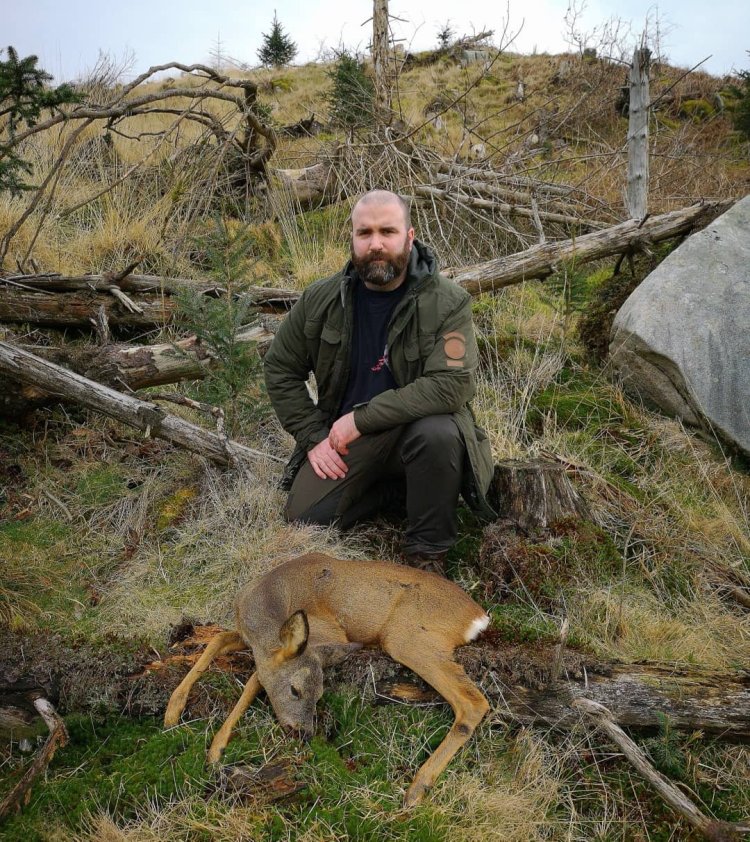
As we made our way down the hillside, Kris carried out the gralloch or, as some people call it, ‘field dress’. The purpose of the gralloch is to remove the entrails in order to reduce the temperature of the carcass so that the meat does not spoil or become contaminated. It is here that you check for signs of disease in the animal and I’m glad to say my little Roe Doe had been living a good life.

With the gralloch done and dusted, we headed back to truck and drove back to base with my dinner sitting in the back. I sat there with a strange sense of pride and a feel of accomplishment because here I was: an office worker who was in less than peak fitness, out of his depth, doing something that was completely new and the day ended on a high note.

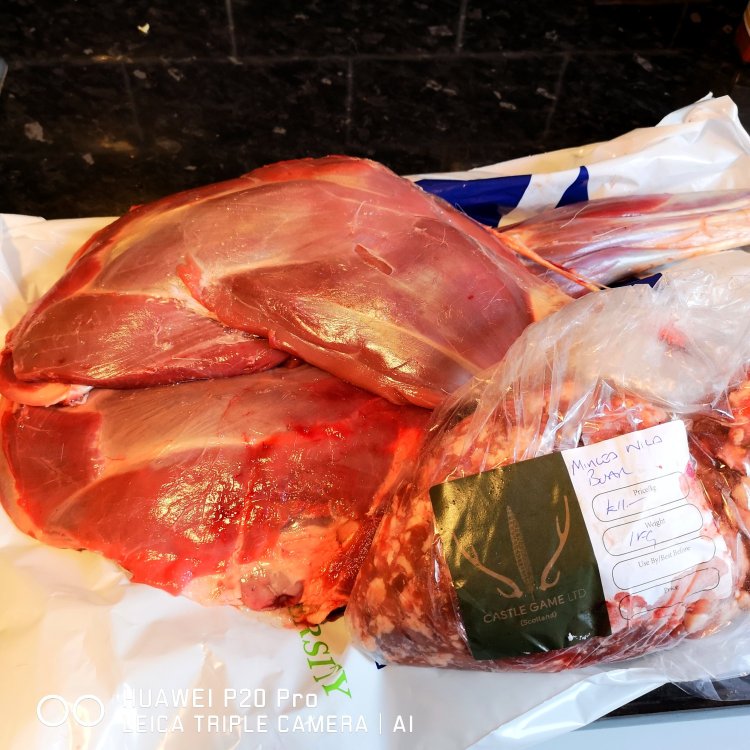
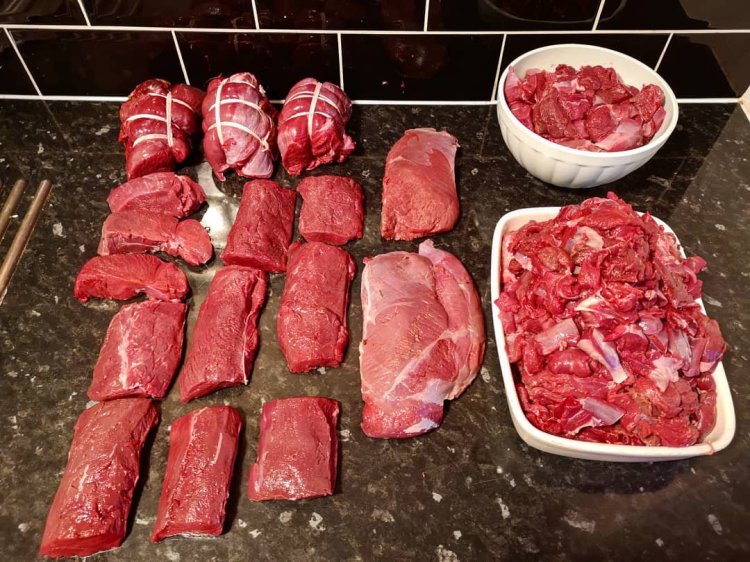
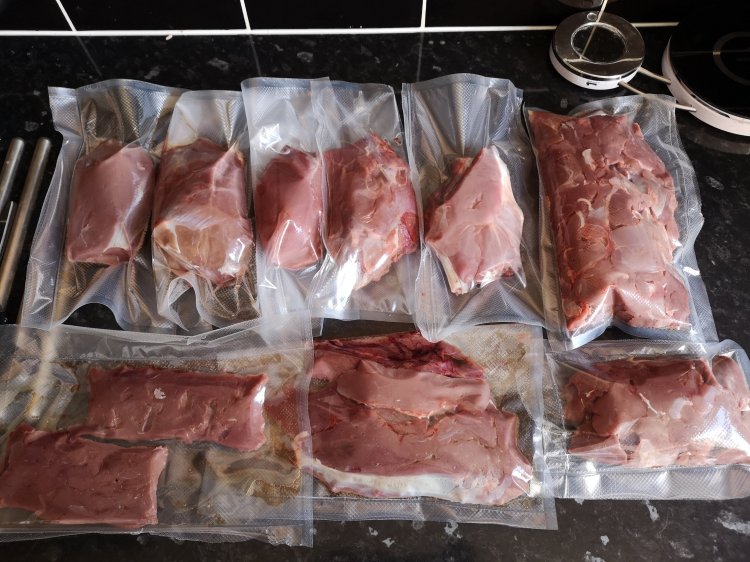
As I made the journey home I was eager to tell my wife, my parents…anyone who would listen but the only person who shared my excitement was my brother. I hung the carcass in my mates garage, ready for butchering. Normally the carcass would hang for a few days but with the weather being abnormally warm for February, I skinned it and broke the carcass down into the forequarters, saddle and hindquarters.

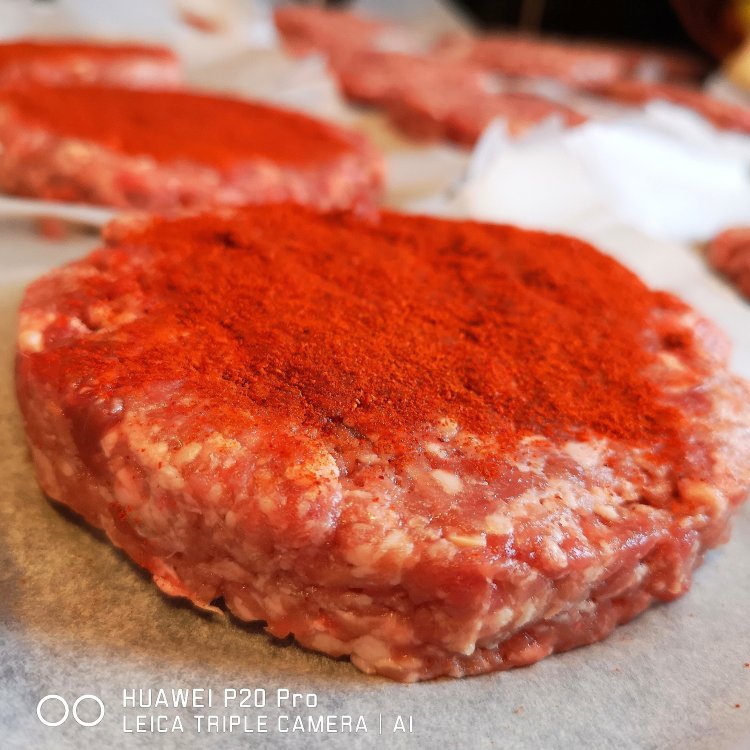
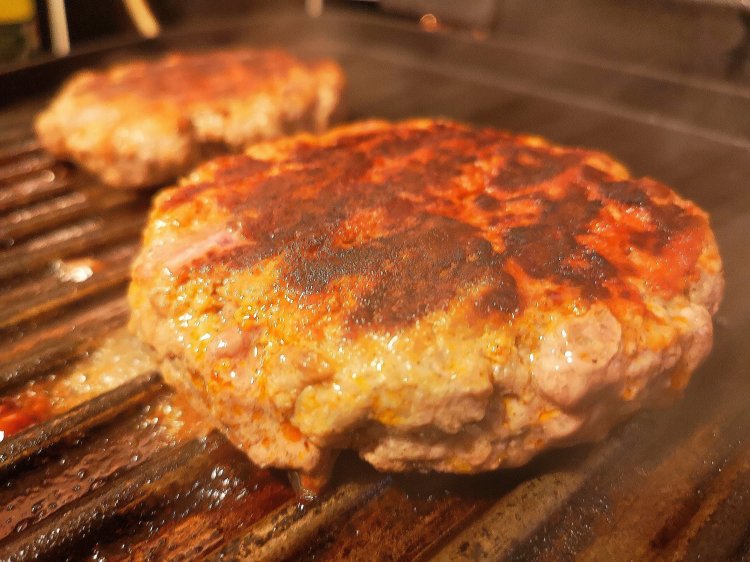
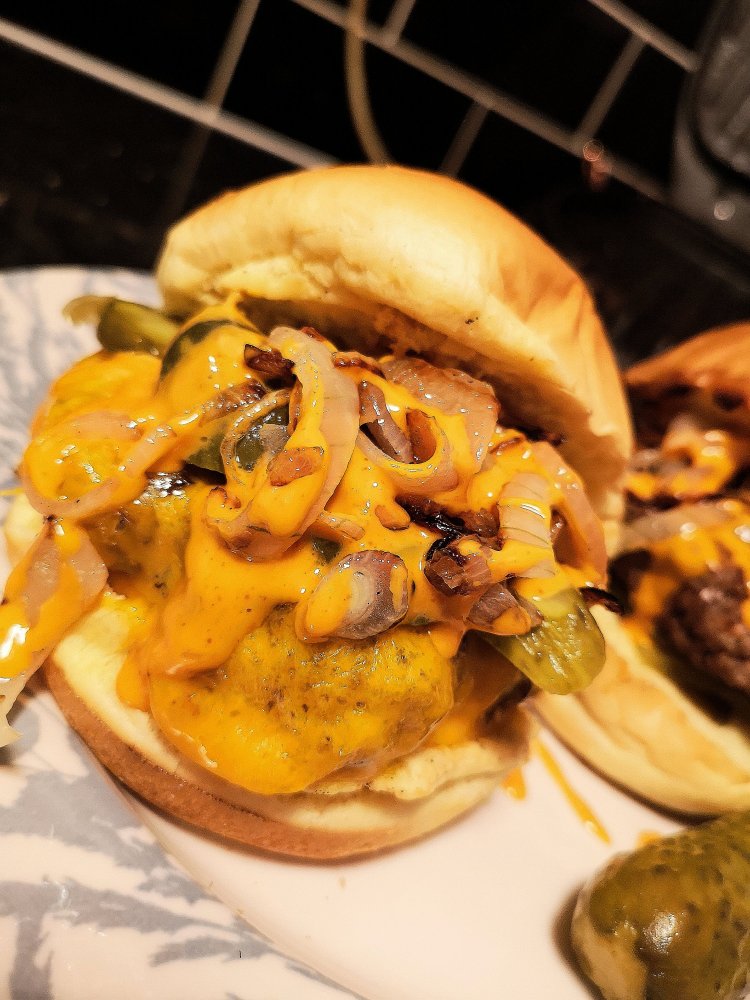
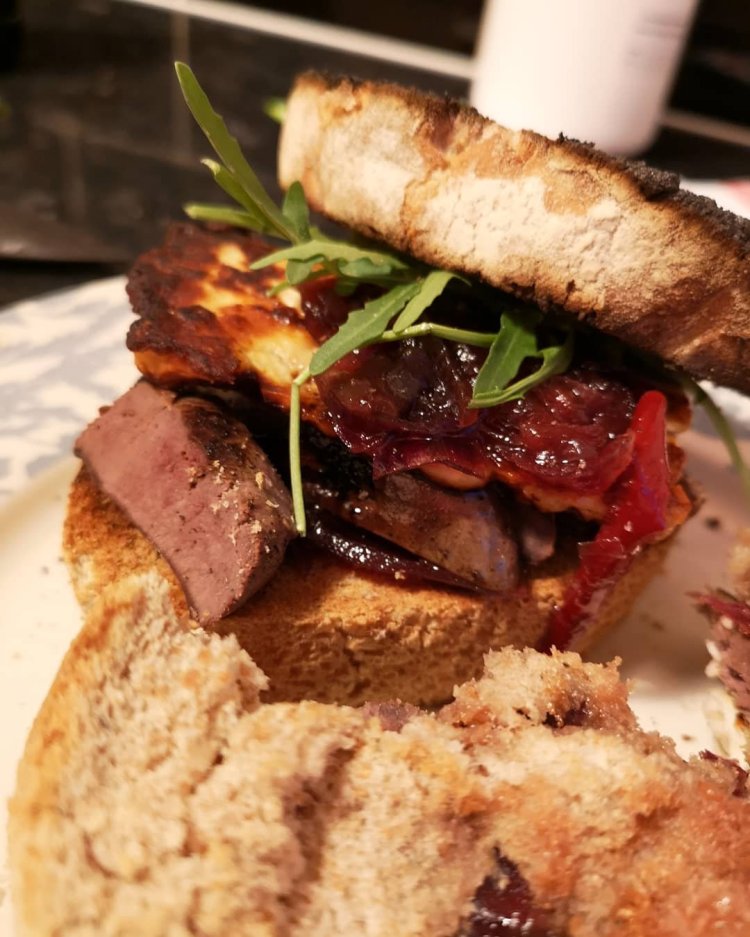
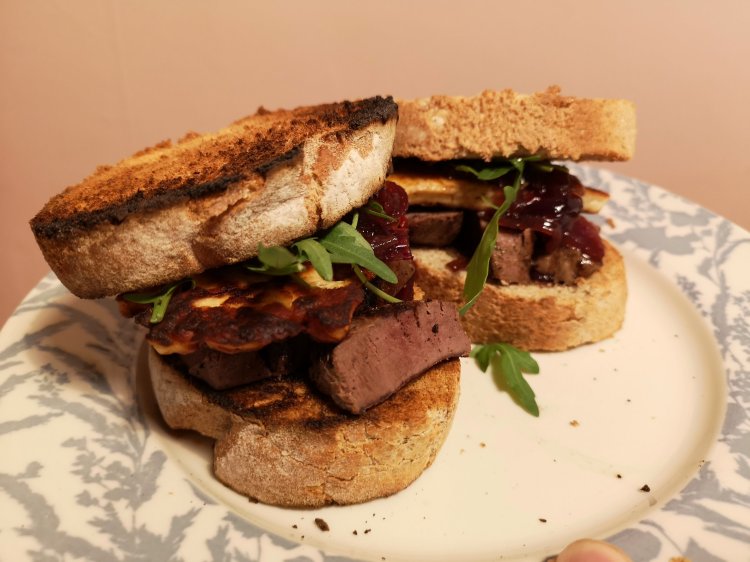
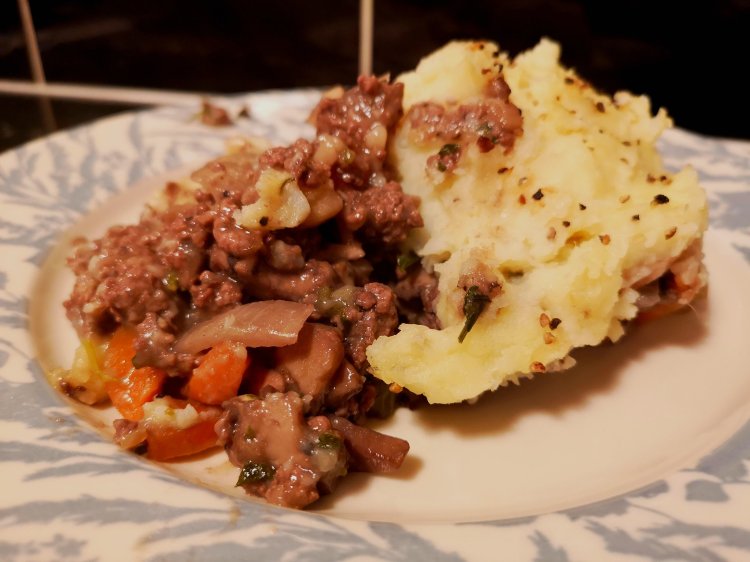
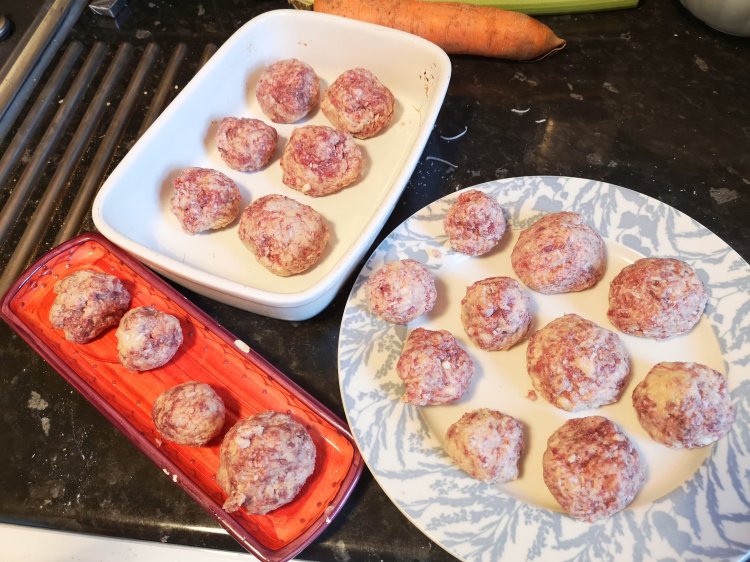
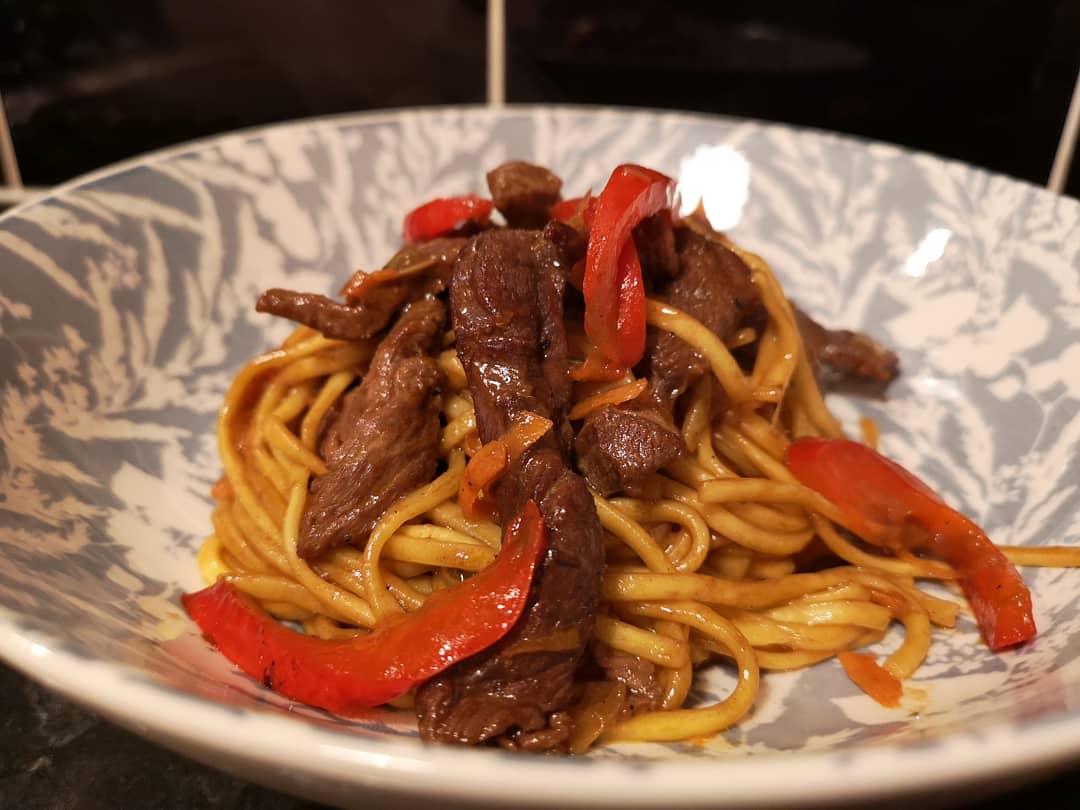
This was my first attempt at butchery but I think I did ok and my little Roe yielded 3.3kg of excellent eating, which I vacuum sealed for the freezer:

And there you have it, my first stalk.

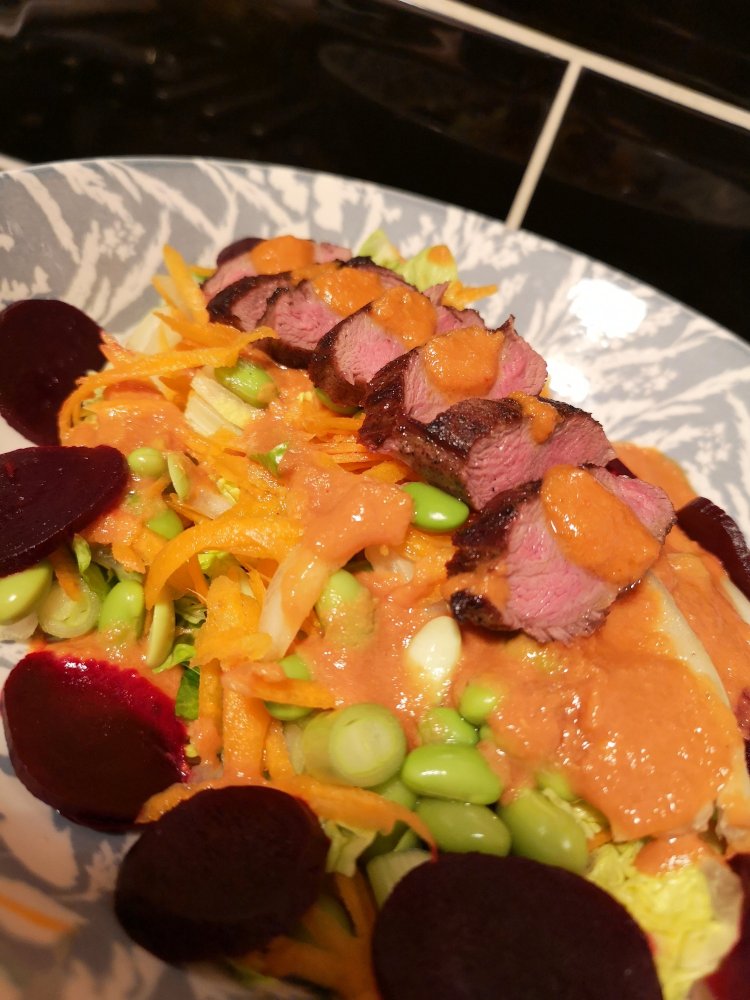
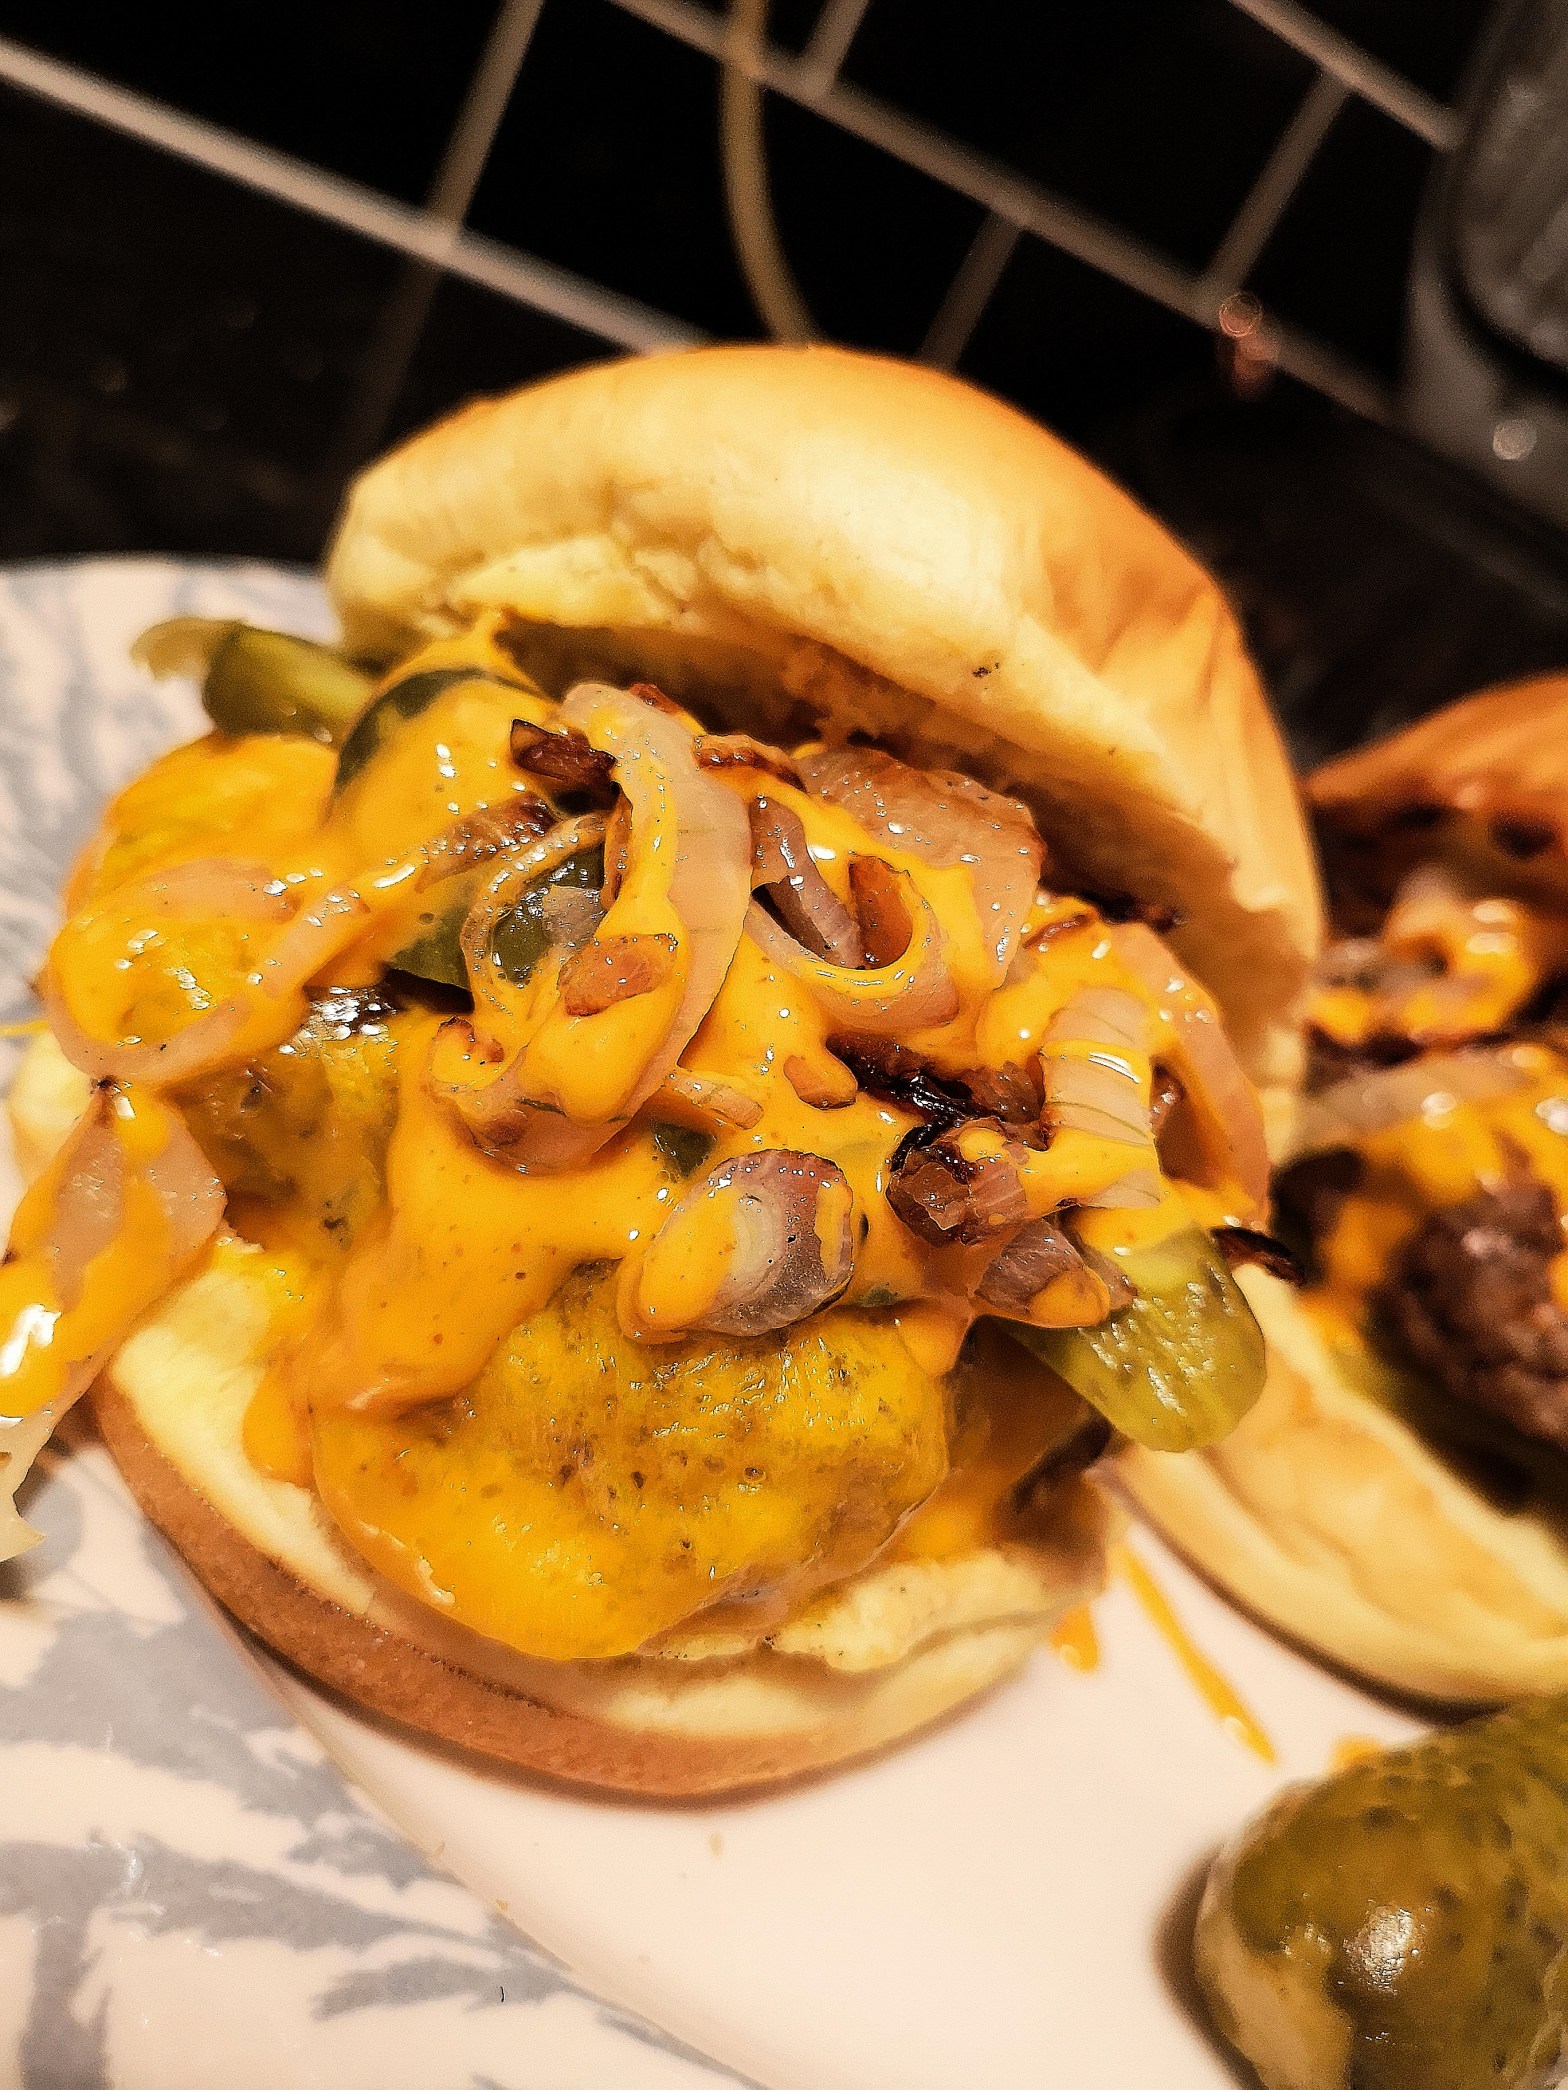
As you can tell by the name of my blog and my Instagram page: @field_to_fork_food , this is all about sustainable wild food that has been shot/caught for the sole purpose of eating. There is an abundance of wildlife out there, some of which needs to be managed and the byproduct is then used to feed myself and my family for weeks and months to come.

I enjoy cooking, I’m also really enjoying the butchering process (I find it very relaxing) but my main goal now is to study for my DSC1 and eventually proceed to my level 2. I find it a fascinating skillset and what is more exciting than going out in the fresh outdoors and going on the ultimate extreme food shop.

I’m already booked in for my next stalk at the beginning of May and I cannot wait. Until then, I am in contact with local gamedealers who I have reached out for deer carcasses. Not only am I supporting and industry I am interested in but I’m preparing and eating the best free range meat that has lived a great life in a sustainable environment. No more shop bought ‘free range’ chickens for me.

On a side note, I’m a big fan of zero waste. All bones and scraps were kept aside for someone who feeds their dogs the BARF diet. The hide was disposed of but going forward I’m keen to learn how to tan my hides in order to make the best use of the deer.

Thanks for reading.

Monkfish Tikka Kebabs

A few weeks back I receive a text from my brother asking if I want any fish. Despite my brother being a chef I kind of felt this was very random but as I love a bit of fish, I said yes. He then asked me “what do you want”? I politely ask for whatever and he offers up some Haddock, Plaice, Turbot and the almighty Monkfish. I say yes to them all, followed up with “where did you get them”?

As I found out, my brothers friend is a commercial fisherman and he takes some of the catch and offered it to my brother. Simple as that, no dodgy black market dealings, just a mate who catches fish and had surplus stock…. HAPPY DAYS.

If you have never seen what a Monkfish looks like then please Google it as they are the ugliest things I’ve ever seen, however and this is a huge HOWEVER, the meat you get from their cheeks and tail is some of the finest fish you will ever taste…no joke.

So I pick up my collection of fish and was amazed at the size of the tail I was given….it was gargantuan:

Anytime I have had Monkfish, it has been from an Indian restaurant where they tend to serve it grilled with a Tikka sauce. I’ve made this a few times over the years but not since my kids were born so I thought I’d chance my luck and see if they would eat it too (kids are the fussiest eaters).

Needless to say it was a success. The recipe below is super easy to make and you can even marinade the fish overnight but 30 minutes will also suffice. If you can’t be bothered making your own tikka sauce then a spoonful or two of Tikka paste, mixed in with natural yoghurt will do.

Enjoy and let me know what you think:

Recipe:

INGREDIENTS

500g monkfish tail, cubed

FOR THE MARINADE

225g natural yoghurt
3 cloves garlic, crushed
1 teaspoon ground ginger
1 tablespoon lime juice (about half a lime)
1 teaspoon chilli powder
½ teaspoon turmeric
½ teaspoon garam masala plus extra to serve
75g wild rice

METHOD

In a bowl, mix all the marinade ingredients and add the monkfish.
Leave to marinate for 30 minutes.
Grill the monkfish skewers for a couple of minutes each side, or until cooked through and charred a little on the outside.

Serve with your cooked rice and a dollop of Tzatziki (the more the merrier)
It doesn’t look much but it tastes amazing.

Goose Breast Stir Fry

It’s Wednesday, Happy Hump Day…or whatever that means. For me it means that I’m now off work till Monday, I’m off to the shooting range tomorrow and my deer stalk on Saturday. Quite a busy few days but it beats sitting at a desk all day.

It’s been a weird week. Despite it being February the weather has been strangely mild. My daughter has been ill and I’m stressed out because all I want to do is make her better but I can’t and as a parent, that sucks.

Anyhoo, it’s 8pm, the kids are playing before bed but my appetite is insatiable and I need fed like 2 hours ago. Thankfully I’m kind of prepared and my goose breast from the greylag goose I plucked and breasted last week has defrosted. I check my cupboards for sauce, I spy some Soy and Hoisin sauce. I check my fridge, I see some peppers and spring onion….perfect, stir fry it is.

If you have never had goose breast before then you are in for a real treat. It is super tasty and lean but not too lean where it tastes like you’re eating old leather. It doesn’t taste like a bird, in fact, if anything it tastes like beef and when thinly sliced it tastes delicious. Give it a go and see what you think and failing that, swap the goose out for some chicken or beef and if you don’t eat meat, by all means have tofu or seitan.

ALOT of the time I am on the ball and preparation is key. I’ll happily spend an hour the previous night making a sauce from scratch but with everything going on right now I am relying on shop bought items from my local supermarket.

This recipe is a no brainer and takes 10 minutes to cook and about 5 minutes to prep. It’s a stir fry after all so here goes:

Goose Breast Stir Fry

You will need:

1 goose breast (thinly sliced)
1 sliced red pepper
4 chopped spring onion
1 chopped garlic glove
1 pack egg noodles
Soy sauce
Bottle of Hoisin sauce
Sesame oil

•Grab your wok, add some oil and turn up the heat.

•Once your wok starts to smoke, add your goose.

•Cook the goose for about 3 minutes then add a splash of soy and 1/3 bottle of hoisin sauce. Mix it all together.

•Add your veg and cook for about 4 mins or until the peppers have started to soften.

•Add the noodles, mix everything together for 3 minutes then serve.

Doe, A Deer, A Female Deer

In a few days time I will be going on my first Deer Stalk. I do not know what will happen on the day itself but if I am lucky I will stalk deer, shoot deer, gralloch the deer and hopefully take the carcass home for me to butcher and provide food for my family.

Alternatively, I could spend several hours in the stunning Scottish countryside, stalk no deer but come away with knowledge in something that I find fascinating and I’m keen to learn more about. I’m not hear to wax lyrical about hunting, this isn’t what this post is about as I know many friends and family don’t quite ‘get it’. That’s cool though, I expect that and I appreciate it because for the best part, people don’t agree with hunting and this is partly why I am so keen to learn more about Deer Management.

I booked my stalk about 4 weeks ago and it’s all I can think about. I’m nervous and excited all at the same time. It’s completely new for me but it’s something I want to learn more about, not just because I love cooking and eating venison but because I feel that shooting does get a bad name.

Maybe if people had a greater sense of the damage that these animals can cause to the landscape, farmland and farmers crops then maybe they would accept why certain animals need to be culled? I for one like to know where my food comes from, I like to imagine that the chicken that I bought from the supermarket has led a truly free range life instead of living in a cramped barn with little to zero daylight. Thankfully I am not naïve and I know fine well that my chicken, pork of beef has come from an animal that may not have had the best journey before it reaches my plate but as you tuck into your roast chicken or what have you, do not judge me for wanting to shoot a deer.

You see, a deer is an absolutely beautiful animal and is an iconic creature here in Scotland, my homeland. A deer has lived freely in the wild, it’s eaten what it’s wanted to eat, it’s roamed the land openly and lived a pretty good life. It’s lived such a good life that you can truly say that deer is the ultimate free range animal and therefore, venison is free range.

Isn’t it fantastic to know that the food I will be providing my family with is 100% free range and has eaten organically its entire life? For me, that is what it is all about.

I can hear some people say “no animal should be killed” and I respect those who say believe that and this is where the Deer Management and Culling process really interests me.

Imagine this:

You are an arable farmer, you have acres of land where you grow your crops. This is your livelyhood, this is your bread and butter and your sole means of an income. This is how you provide for your family. Over a period of time you start to notice your crops are being damaged/eaten. You notice deer have been on your land and causing this damage, which ultimately affects your crops. If your crops are affected then your sales are affected and your ability to provide is impacted. What do you do? You take action to remedy the problem….and this is why Deer need to be managed. They need to be managed as ethically as possible.

Scenario two could play like this:

You are a Deer Stalker, you have been informed by a land owner that an injured deer has been spotted limping and action needs to be taken, what do you do? Well, the most humane thing anyone can do in this situation is put the animal out of its misery. Some would say this is cruel but what would be deemed cruel is to let the animal suffer and eventually succumb to its injuries. An ethical shot should be taken to ensure the animal suffers no more and the reality of it all is that sometimes in life you have to be cruel to be kind.

I’ve barely scratched the surface here and this is exactly why I am keen to learn more about Deer Stalking and Deer Management as I find it truly fascinating. At the end of the day, if my stalk is successful and I come away with a Roe Doe in the boot of my car, I know deep down that the food provided to me by the animal I have shot has lived the best life compared to some ‘free range’ hen that Tesco sells for £5.

The sole purpose of my journey into Field to Fork cooking is have more respect for the food I am consuming. I am a firm believer that if you shoot it then you eat it, otherwise what is the point? If I am able to provide my family with food I have sourced with my own hands: prepared it, butchered it, cooked it, then I have achieved what I set out to do and I am ok with that.

I must reiterate, I am not a professional writer/cook/butcher. I’m merely a guy who wants to be good at something and have a sense of pride in the work I have done. I love to cook so why not go that one step further?

I end this massive blog with a photo of a beautiful Stag that my friend, Mark, shot (with a camera) whilst on holiday in Glen Etive. You can follow him on Instagram: @markscatesphotography.

Despite the title of this blog, I am aware the photo is not a Doe….doh!

Thanks for reading

Keith

Design a site like this with WordPress.com
Get started